VirtualBox Linux-Gast VDI-Festplatte verkleinern/reduzieren - Host: Windows, Gast: Ubuntu/Lubuntu
VirtualBox-Festplatten (VDI, VMDK oder VHD) blähen sich mit der Zeit auf. Das liegt daran, dass gelöschte Dateien auf einer VBox-Festplatte (Gast-System) tatsächlich nicht gelöscht, sondern nur den Status "frei" erhalten. Damit belegen auf OS-Ebene "gelöschte" Dateien trotzdem noch den Speicher einer VirtualBox-Festplatte.
Hierfür gibt es jedoch eine Lösung. VirtualBox stellt ein Programm zur Verfüfung, mit diesem die Status "frei"-Blöcke wieder entfernt werden können. Diese müssen aber vorher auf Null umgeschrieben werden.
In diesem Artikel zeige ich wie das Step by Step funktioniert, damit ihr eure VDI-Festplatte verkleinert könnt.
1.0 Die Systembereinigung - Step 1/3
1.1 Gast-System (Linux) bereinigen
Damit die VDI-Festplatte so gut wie möglich verkleinert werden kann, sollten vorher alle unnötigen Dateien/Programme auf dem Gast-System gelöscht werden. Löscht entsprechend jetzt alle nicht benötigten Dateien und Programme auf eurem Gast-System.
Zusätzlich können die folgenden Aktionen durchgeführt werden, um das System zu bereinigen.
1.2 Unnötige Kernels entfernen
Mit diesem Befehl werden unnötige Kernels entfernt:
$ sudo apt-get autoremove --purge

1.3 Cache leeren
Alte Installationsdateien aus dem Paket-Cache (/var/cache/apt/archives) löschen:
$ apt-get clean
Weitere Möglichkeiten zum Bereinigen eines Linux Systems findet ihr hier: Linux bereinigen
2.0 Festplatte mit Zerofree vorbereiten - Step 2/3
2.1 Linux Tool Zerofree installieren
Zerofree wird später im Boot-Menü/Recovery-Mode benötigt. Damit muss das Programm *vorher* mit folgendem Befehl unter Linux (Gast-System) installiert werden. Installiert jetzt Zerofree auf dem Linux System (Gast-System) mit folgendem Befehl:
$ sudo apt-get install zerofree
2.2 Linux (Gast-System) im Boot-Menü / Recovery mode starten
Zerofree beschreibt ungenutzte Blöcke (Status "frei") mit Nullen, damit diese Blöcke später entfernt werden können. Damit das funktioniert, muss Linux über das Boot-Menü ausgeführt und die Festplatte vorher auf read only (ro) gestellt werden.
Bootet dazu die VBox (Gast-System) neu und öffnet das Boot-Menü. Drückt dazu im Bootvorgang bei Ubuntu die ESC-Taste.
Navigiert jetzt mit den Pfeiltasten auf "Erweiterte Option für Ubuntu" (bzw. auf englisch: "Advanced options for Ubuntu") und drückt Enter. Wählt dort den aktuellsten Kernel mit dem Zusatz "(Recovery mode)" aus und drückt wieder Enter. Bei Lubuntu ist der Punkt "Recovery mode" aufgrund der niedrigeren Auflösung eventuell nicht zu sehen. Wählt dann den zweiten Punkt aus. Das sollte der "Recovery mode" sein.
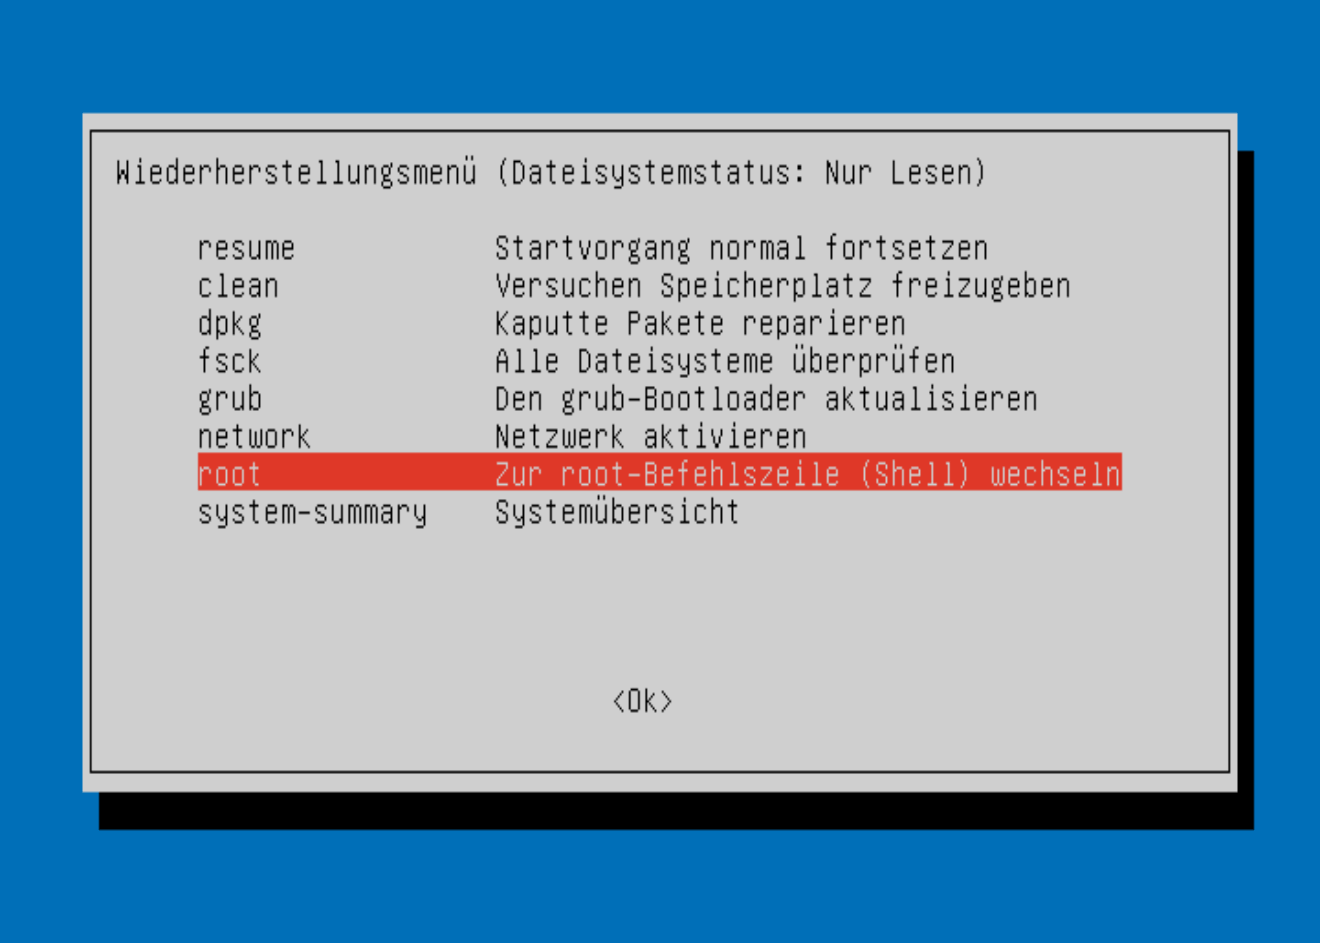
Es öffnet sich das Wiederherstellungsmenü. Je nach Linux-Version sollte dies wie folgt aussehen (s. Bild u.). Navigiert jetzt mit den Pfeiltasten zum Unterpunkt "root" : "Zur root-Befehlszeile (Shell) wechseln" und drückt Enter:

Drückt anschließend nochmals Enter um in die root-Befehlszeile (Shell) zu gelangen.

Ihr seid jetzt in der Recover-Mode Shell. Jetzt muss die Festplatte auf read only gestellt werden.
2.3 Festplatte auf read only (ro) stellen
Mit folgendem Befehl wird die Festplatte jetzt auf read only (ro) gestellt. Das ist notwendig, damit Zerofree erfolgreich ausgeführt werden kann. Führt dazu jetzt diesen Befehl aus:
$ systemctl stop systemd-journald.socket && systemctl stop systemd-journald.service && sudo swapoff -a && mount -n -o remount,ro -t ext2 /dev/sda1
Folgende Meldung sollte jetzt erscheinen:

Die Festplatte ist jetzt innerhalb einer Session auf read only (ro) gestellt. Erfahrungsgemäß wird dieser Status nach etwa zwei Minuten automatisch wieder zurückgesetzt. Daher muss Zerofree jetzt zeitnah ausgeführt werden.
2.4 Zerofree ausführen
Führt Zerofree jetzt mit folgendem Befehl aus:
$ zerofree -v /dev/sda1
Sollte an dieser Stelle die Meldung "zerofree: filesystem /dev/sda1 is mounted rw" erscheinen, dann ist der Status wieder zurück auf read/write gesetzt worden. In diesem Fall einfach den vorherige Befehl nochmals ausführen (Punkt 2.3) und Zerofee erneut zeitnah starten (Punkt 2.4).
Die Umschreibung der Nullen wird nun durchgeführt. Dies dauert bei einer Festplattengröße von 80-100gb (SSD) ca. 5 Minuten. Das Ergebnis sollte wie folgt aussehen:

Fährt das Gast-System jetzt mit diesem Befehlt herunter.
$ shutdown now
3.0 VDI-Verkleinerung durchführen - Step 3/3
3.1 Mit VBoxManage die VDI-Festplatte effektiv verkleinern
In diesem Abschnitt wird die VBox Festplatte (VDI-Datei) sichtbar verkleinert. Ausgeführt wird dies auf dem Windows-Host. Das Linux Gast-System muss in dieser Zeit ausgeschaltet sein.
Öffnet auf dem Windows-Host die Windows PowerShell und navigieren zur VDI-Datei. Tipp: Öffnet das Verzeichnis mit dem Explorer, drückt dort Shift + rechte Maustaste und geht auf den Menüpunkt "PowerShell-Fenster hier öffnen". Damit öffnet sich die Powerschnell im ausgewähltem Verzeichnis.
Führt jetzt diesen Befehl (mit dem &-Zeichen) in der PowerShell aus. Damit beginnt VBoxManage.exe mit der Reduziertung/Verkleinerung der VDI-Festplatte:
& 'C:\Program Files\Oracle\VirtualBox\VBoxManage.exe' modifymedium disk '.\Lubuntu 18.04 mini WB-v2-MNTN1-disk1.VDI' --compact
Dieser Vorgang dauert bei einer 80-100gb VDI-Datei/Festplatte ca. 5 Minuten. Das Ergebnis sieht dann wie folgt aus:

Das war's, die VDI-Datei ist nun erfolgreich verkleinert bzw. reduziert worden.
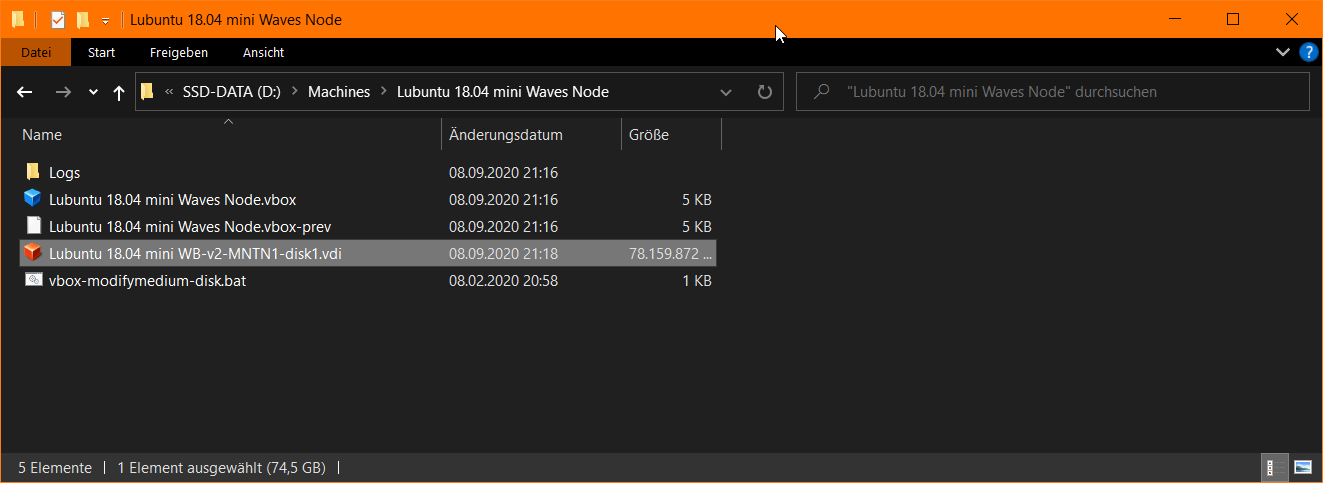
Vorher: 78,15 GB

Nachher: 74,73 GB

4.0 Mögliche Fehlermeldungen
4.1 Failed to lock media when compacting ...VDI
Meldung: "VBoxManage.exe: error: Failed to lock media when compacting...VDI" und "error: Failed to compact medium!"
Lösung: In diesem Fall ist die virtuelle VBox Maschine noch aktiv und muss heruntergefahren werden.
