VirtualBox Windows-Gast VDI-Festplatte verkleinern/reduzieren - Host und Gast: Windows
VirtualBox-Festplatten (VDI, VMDK oder VHD) blähen sich mit der Zeit auf. Das liegt daran, weil der Virtual-Machine-Monitor beim löschen von Dateien auf dem Gast-System, den virtuellen Datenträger nicht automatisch verkleinert. Das hat einen nützlichen Hintergrund. Kurz gesagt, verhindert dies häufige Zugriffe auf die Festplatte, was der Lebensdauer der Festplatte zugute kommt. Es ist trotzdem möglich virtuelle Festplatten (VDI, VMDK oder VHD) zu verkleinern. Dazu stellt VirtualBox ein entsprechendes Tool zur Verfügung.
Step by Step erfährt ihr in diesem Artikel, wie ein Windows-Gast VDI-Datenträger reduziert bzw. verkleinert werden kann.
1.0 Die Systembereinigung - Step 1/3
1.0 Vorab Gast-System (Windows) bereinigen
Es macht Sinn, das Gast-System vorher von unnötigen Dateien und Programmen zu bereinigen, d.h. Dateien aus z.B. dem Downloadordner zu löschen oder nicht benötigte Programme zu deinstallieren, Papierkorb leeren usw.
2.0 Festplatte mit SDelete vorbereiten - Step 2/3
1.1 Windows Tool SDelete installieren
Auf dem Windows Gast-System muss das Microsoft Windows eigene Programm SDelete heruntergeladen und entpackt werden SDelete (Download)
1.2 SDelete ausführen
Öffnet jetzt auf dem Gast-System die Powershell (oder cmd.exe) und navigiert zum Verzeichnis, wo ihr das Tool SDelete abgelegt habt.
Tipp: Drückt [Shift] + [rechte Maustaste] im SDelete-Verzeichnis und klickt dann auf "PowerShell-Fenster hier öffnen". Damit wird die PowerShell im entsprechendem Verzeichnis geöffnet.
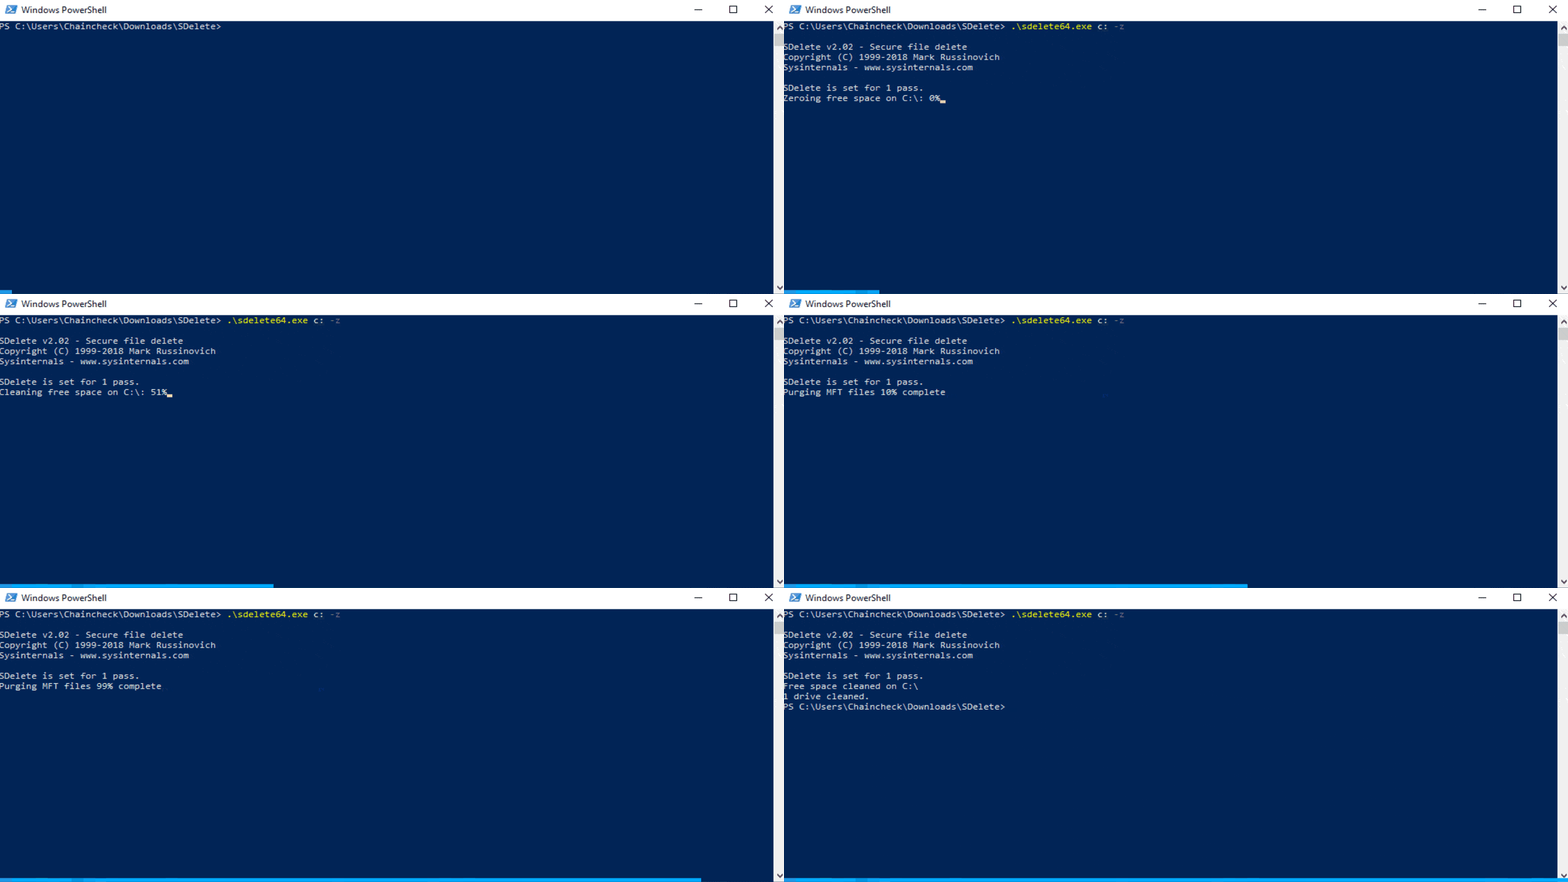
Führt jetzt den folgenden Befehl in der PowerShell aus, um den ersten Vorgang (ungenutzte Blöcke auf Null umschreiben) abzuschließen Verwendet bei einem 32-bit System sdelete.exe statt sdelete64.exe. Im Normallfall benutzen alle Windows 64Bit. Die Systeminformationen könnt ihr unter Windows mit [Windows-Taste] + [Pause] prüfen (Systemtyp).
$ sdelete64.exe c: -z
Bei einer Festplattengröße von ca. 30 GB dauert dieser Vorgang etwa 5 Minuten (Animation ist beschleunigt):

3.0 VDI-Verkleinerung durchführen - Step 3/3
2.1 Mit VBoxManage die VDI-Datei/Festplatte effektiv verkleinern
Jetzt folgt der abschließende Teil. Hier wird die VDI-Datei, d.h. die VDI-Festplatte tatsächlich verkleinert.
Öffnet dazu auf dem Host die Windows PowerShell und navigiert zur VDI-Datei. Führt jetzt den folgenden Befehl in der PowerShell aus, um die Reduziertung/Verkleinerung der VDI-Datei zu beginnen. Beachtet: Das &-Zeichen muss am Anfang auch eingegeben werden. Das $-Zeichen nicht.
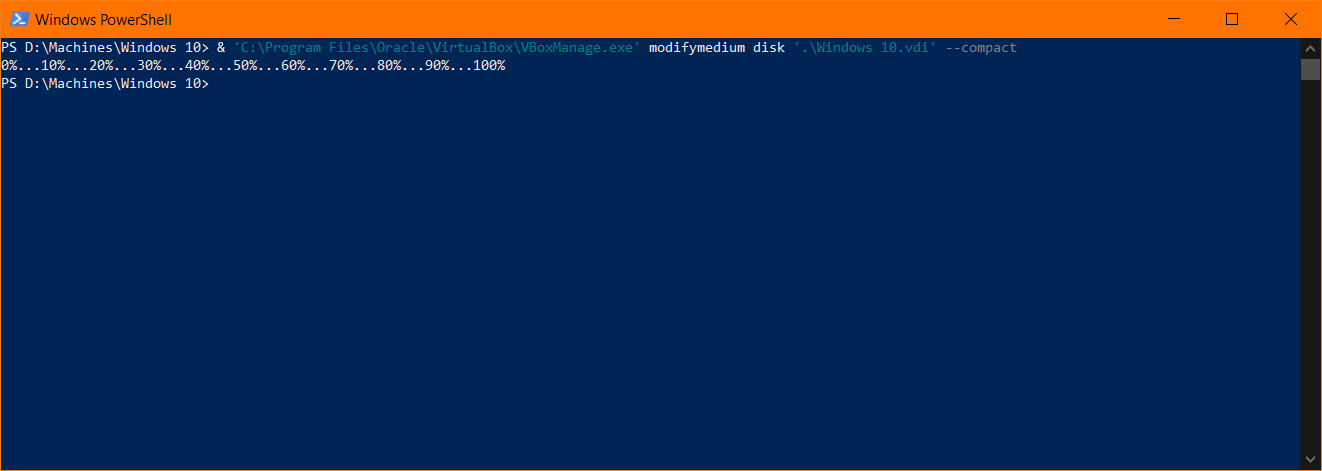
$ & 'C:\Program Files\Oracle\VirtualBox\VBoxManage.exe' modifymedium disk '.\Windows 10.VDI' --compact
Bei einer ~31 GB großen VDI-Festplatte dauert dieser Vorgang etwa 5 Minuten. Das Ergebnis sollte wie folgt aussehen:

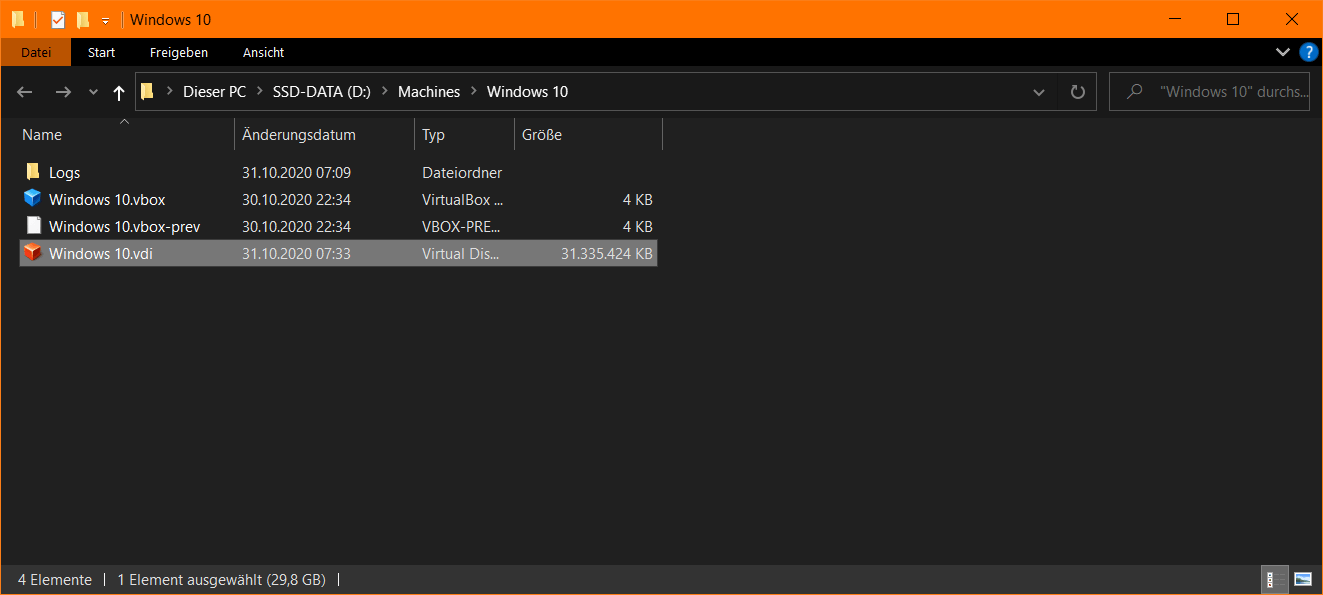
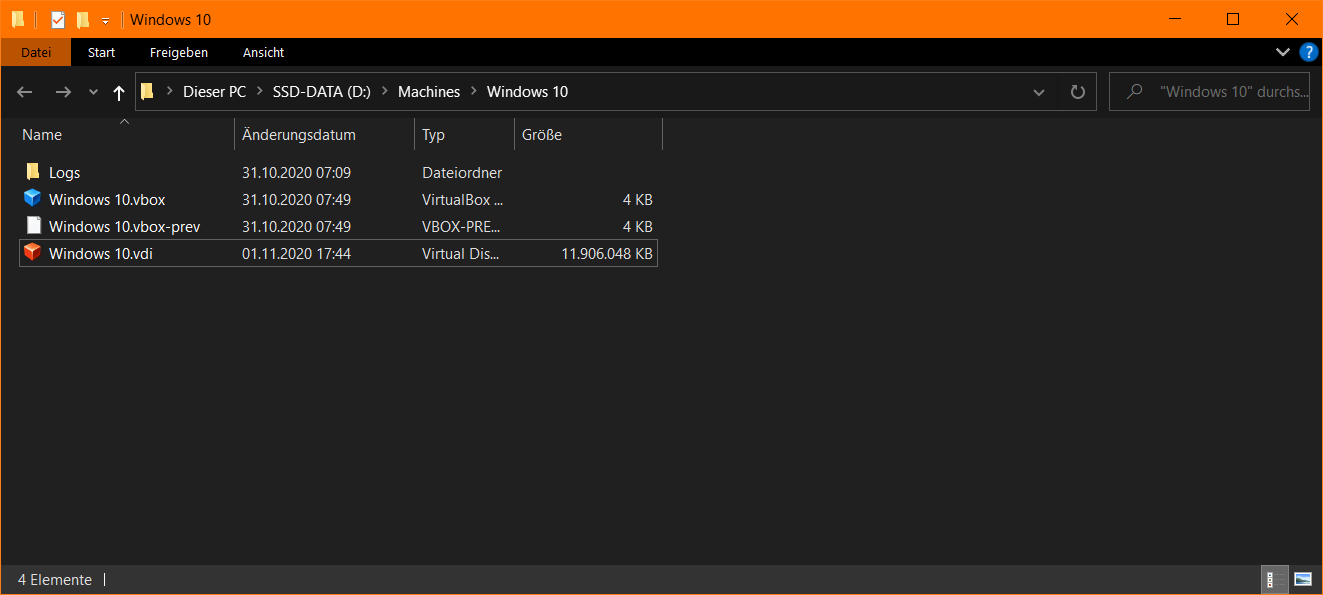
Das war's, die VDI-Datei/Festplatte ist erfolgreich verkleinert bzw. reduziert worden. Ein Beispiel, wie das Ergebnis aussehen könnte:
Vorher: 31 GB

Nachher: 11 GB
